
Suspect your phone has water damage? Don’t panic! It’s a common problem, and there are ways to check and potentially save your device. This article provides a comprehensive guide to help you determine if your phone is indeed water damaged. Learn how to recognize the tell-tale signs of water exposure, from obvious malfunctioning to subtle indicators you might overlook. We’ll cover various checks for both Android and iPhone devices, empowering you with the knowledge to assess the severity of the water damage and decide on the next best steps.
Acting quickly is crucial when dealing with potential water damage to your phone. Delaying diagnosis and proper care can worsen the damage and significantly reduce the chances of recovery. This article will walk you through a series of simple yet effective methods to check for water damage, helping you determine the extent of the issue before it becomes irreparable. We’ll explore the important indicators of water damage, helping you avoid the pitfalls of misdiagnosis and guiding you towards the appropriate actions for potential repair or data recovery.
Initial Signs of Water Damage
One of the most immediate signs of water damage is the presence of moisture. Look for water droplets or condensation behind the screen or within the camera lens. A foggy or hazy screen is another telltale sign. Be aware that moisture might not be readily visible, especially if the water exposure was minimal.
Changes in audio quality can also indicate water damage. If your phone sounds muffled, distorted, or has no sound at all, water may have entered the speaker or microphone. Difficulty charging the phone or erratic charging behavior is another symptom. The charging port is particularly vulnerable to water damage.
Unusual behavior like unexpected shutdowns, app crashes, or unresponsive touchscreens can also point towards water damage. While these issues can stem from other causes, coupled with potential moisture or audio problems, they strengthen the possibility of water damage.
Checking for Physical Indicators
A visual inspection can often reveal telltale signs of water damage. Carefully examine your phone for the following:
Liquid Residue
Check for any trapped moisture or discoloration behind the screen. Look closely at the edges of the screen and around buttons for any signs of water ingress or mineral deposits.
Corrosion
Examine charging ports, headphone jacks, and SIM card slots for signs of corrosion. Corrosion appears as a greenish-white or rusty buildup and indicates water exposure.
Water Damage Indicator (LDI)
Most modern phones have a Liquid Damage Indicator (LDI) sticker. This small sticker, usually white or silver, turns a vibrant color (often red or pink) when exposed to liquid. Consult your phone’s manual for the LDI location, which is often inside the SIM card slot or near the battery compartment (if accessible).
Testing Phone Functionality
Beyond visual checks, testing your phone’s core functions can reveal underlying water damage. Power on your device. If it doesn’t start, it could be due to water damage affecting the battery or internal circuitry. If it does power on, proceed with these tests:
Test the screen’s responsiveness. Tap icons and navigate menus. Look for any delays, unresponsiveness, or ghost touches. These can indicate damage to the digitizer.
Make a test call. Pay attention to both the speaker and microphone. Can you hear the other person clearly? Can they hear you? Static, muffled sound, or complete silence suggests water damage to these components.
Check the charging port. Carefully plug in your charger. Does it connect properly and initiate charging? If not, the charging port might be corroded due to water exposure.
Test other functionalities. This includes buttons (volume, power), cameras (front and back), and sensors (proximity, fingerprint). Any malfunction could be related to water ingress.
Using Diagnostic Tests
Many modern smartphones include built-in diagnostic tools that can help identify potential hardware issues, including water damage. These tests often cover various components like the screen, battery, sensors, and more.
Access to these diagnostic tests varies depending on the phone’s manufacturer and operating system. For Android devices, there might be a hidden diagnostic menu accessible by entering a specific code in the phone dialer app. For iPhones, Apple’s diagnostics are primarily performed by Apple technicians, although some third-party apps claim to offer similar functionality. Consult your phone’s documentation or manufacturer support for instructions on how to access these tests.
Be cautious when using third-party diagnostic apps. Ensure they are from reputable sources and have positive user reviews, as some apps may not provide accurate results or could even be malicious.
While these diagnostic tests can sometimes provide clues, they might not definitively confirm water damage. A failed test might indicate a problem, but not necessarily water-related. Similarly, a passed test doesn’t entirely rule out water damage, especially if it’s internal and not yet affecting the tested components. Consider these tests as one piece of the puzzle in assessing potential water damage.
Exploring Water Damage Indicators
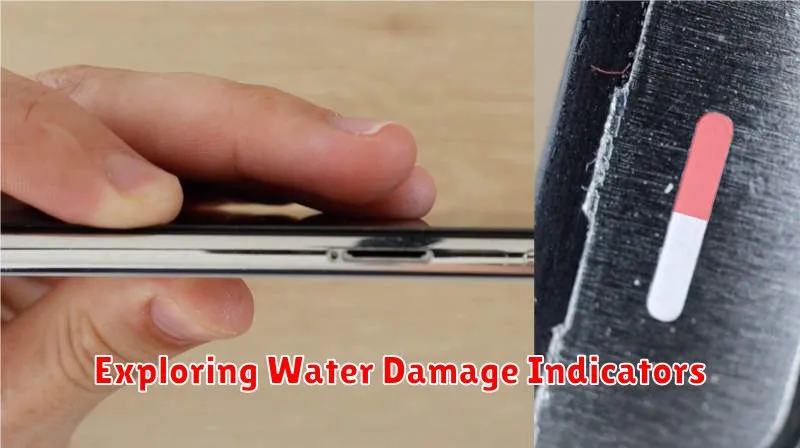
Many modern smartphones include built-in Liquid Contact Indicators (LCIs). These small stickers change color upon contact with water or other liquids. Manufacturers place these indicators in strategic locations, often within the SIM card slot or near the charging port.
Checking the LCI can provide valuable information about potential water exposure. Typically, the LCI is white or silver. After contact with liquid, it may turn pink, red, or another designated color as specified by the manufacturer.
Important Note: While a triggered LCI strongly suggests water damage, a pristine LCI doesn’t necessarily guarantee the absence of damage. Water could have entered the phone without reaching the LCI’s location. Conversely, sometimes an LCI can be triggered by high humidity.
Consult your phone’s user manual or the manufacturer’s website to locate the LCI on your specific model and to understand the designated color change indicating water damage.
Professional Repair Options
If DIY methods fail or you’re uncomfortable tackling the issue yourself, seeking professional repair is crucial. Authorized service centers for your specific phone brand offer the most reliable repairs using genuine parts. They can diagnose the extent of the damage and provide a detailed quote for repair costs.
Independent repair shops are another option, often providing more affordable services. However, ensure they have a good reputation and experience with your phone model. Ask about warranties on their repairs before proceeding.
Mail-in repair services offer convenience, especially if an authorized service center isn’t easily accessible. These services often involve shipping your phone to a repair center and receiving it back after repair. Carefully research the reputation and reliability of mail-in services before selecting one.
Preventive Measures for Water Damage
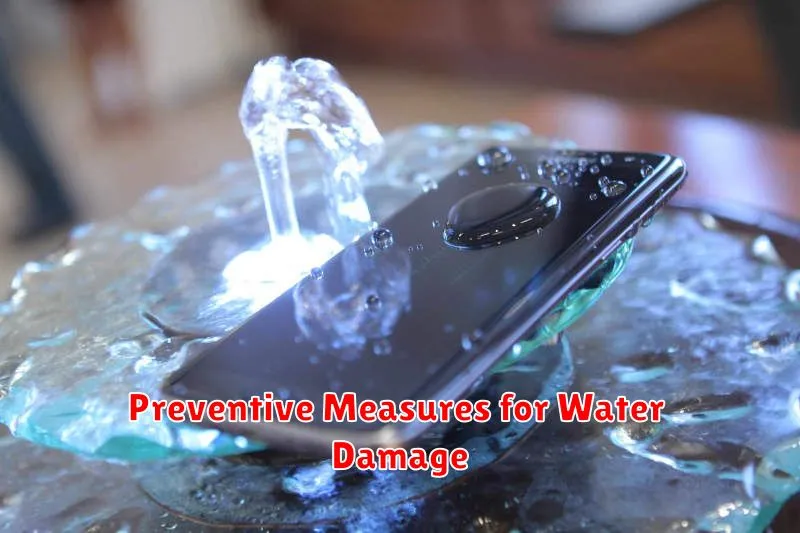
Protecting your phone from water damage is crucial. Prevention is always better than a cure, and there are several steps you can take to safeguard your device.
Invest in a waterproof case. These cases offer excellent protection against splashes, spills, and even brief submersion. Look for cases with a high Ingress Protection (IP) rating. A higher IP rating signifies better water resistance.
Exercise caution around water. Avoid taking your phone near pools, bathtubs, or the beach. If you must use your phone in a potentially wet environment, be extra vigilant.
Dry your hands thoroughly before handling your phone. Even seemingly minor amounts of moisture can cause problems over time. Be mindful of rain and other sources of incidental water exposure.
Consider purchasing a waterproof pouch or dry bag for added protection, especially during outdoor activities or travel. These are affordable and easily portable options.