
Are you tired of the limitations of your stock Android ROM? Do you crave a more personalized and optimized mobile experience? This guide offers a comprehensive, step-by-step approach to installing custom ROMs, unlocking your Android device’s true potential. We’ll delve into the intricacies of ROM installation, covering crucial aspects such as bootloaders, custom recovery, and backups, empowering you to take control of your Android experience and customize it to your exact preferences. Whether you’re seeking enhanced performance, extended battery life, or the latest Android features, this guide will provide you with the knowledge and tools to achieve it all through custom ROMs.
Custom ROMs offer a world of possibilities for Android users. They provide access to the latest Android versions, even for older devices, enhanced performance tweaks, and a wealth of customization options not available on stock firmware. This step-by-step guide will equip you with the necessary knowledge to navigate the ROM installation process safely and effectively. We’ll cover the essentials, from understanding bootloaders and custom recovery to backing up your data and mitigating potential risks. By the end of this guide, you will be well-versed in the art of installing custom ROMs and ready to unleash the hidden power of your Android device.
Understanding the Benefits and Risks of Custom ROMs
Custom ROMs offer a compelling way to transform your Android experience, but it’s essential to weigh the advantages against the potential drawbacks before proceeding.
Benefits
Enhanced Performance and Customization: Custom ROMs often deliver a smoother, faster experience than stock Android. They provide granular control over your device’s appearance and functionality, allowing you to tailor it precisely to your preferences.
Access to Newer Android Versions: If your manufacturer no longer provides updates, a custom ROM can give your device new life with the latest Android features and security patches.
Bloatware Removal: Many custom ROMs come without pre-installed apps you may not want or need, freeing up valuable storage space and improving performance.
Risks
Bricking Your Device: Although rare when following instructions carefully, there’s a risk of rendering your device unusable (bricking) during the installation process.
Voiding Your Warranty: Installing a custom ROM typically voids your manufacturer’s warranty. Be prepared to take full responsibility for your device’s software.
Security Concerns: Some custom ROMs might have security vulnerabilities. Carefully research the ROM and its developer before installation.
Backing Up Your Data: A Crucial First Step
Before venturing into the world of custom ROMs, backing up your data is paramount. Installing a custom ROM often involves wiping your device’s internal storage, which means losing all your data if you aren’t prepared. This backup will be your safety net should anything go wrong during the installation process.
There are several ways to back up your Android device:
- Built-in Backup Feature: Many Android devices offer a built-in backup solution, often linked to your Google account. This can back up system settings, apps, and associated data.
- Cloud Services: Utilizing cloud storage services like Google Drive, Dropbox, or OneDrive allows you to selectively back up important files, photos, and videos.
- Third-Party Apps: Several apps specialize in Android backups, offering more comprehensive options and features.
- Computer Backup: Connecting your device to your computer allows you to manually copy important files and folders.
Choose the method that best suits your needs and ensure you have a complete backup before proceeding.
Unlocking Your Bootloader: Gaining Root Access
Unlocking your bootloader is a critical step before installing a custom ROM. It grants you the necessary permissions to modify the system partition. However, it’s essential to understand that this process usually voids your warranty and can potentially brick your device if not done correctly. Therefore, proceed with caution and follow the instructions precisely for your specific device model.
The unlocking process generally involves enabling developer options and USB debugging in your Android settings. Then, you’ll connect your device to a computer and use platform-specific tools, often provided by the manufacturer, to unlock the bootloader. For some devices, this might require obtaining an unlock code.
Once the bootloader is unlocked, you can gain root access. Rooting provides superuser privileges, allowing you to control all aspects of your device’s software. This is often achieved by flashing a Superuser zip file using a custom recovery, a topic we’ll cover later. Remember, rooting provides significant control but also carries risks if not handled responsibly.
Choosing the Right Custom ROM for Your Device
Selecting the correct custom ROM is a critical step in maximizing your Android experience. Compatibility is paramount. Ensure the ROM is explicitly designed for your specific device model. Using an incompatible ROM can lead to a bricked device.
Research different ROMs available for your device. Popular options include LineageOS, Pixel Experience, and Paranoid Android, each offering unique features and customization options. Consider your priorities. Are you seeking enhanced performance, extended battery life, or a specific aesthetic?
Read user reviews and forum discussions to gauge the stability and performance of each ROM. Look for feedback on bugs, battery drain, and overall user satisfaction. Consider the level of support offered by the ROM’s developers. Active development and community support can be valuable if you encounter issues.
Finally, understand the features offered by each ROM. Some ROMs offer stock Android experiences, while others provide extensive customization options. Consider your needs and preferences when making your decision.
Installing a Custom Recovery: TWRP or CWM
A custom recovery is essential for installing custom ROMs. It replaces your stock recovery with a more powerful tool, allowing you to flash ROMs, kernels, and other modifications. Two popular choices are Team Win Recovery Project (TWRP) and ClockworkMod Recovery (CWM).
TWRP is generally preferred for its touch-based interface and user-friendly design. CWM, while older, is still a reliable option, especially for some older devices.
The installation process varies depending on your device and the recovery you choose. Generally, it involves:
- Downloading the appropriate recovery image for your device.
- Connecting your device to your computer via USB.
- Using platform-specific tools like ADB (Android Debug Bridge) and Fastboot to flash the recovery image to your device’s recovery partition.
Be sure to consult detailed instructions specific to your device and chosen recovery. Incorrect installation can potentially brick your device. Always double-check compatibility and follow the instructions precisely.
Downloading and Flashing the ROM: A Detailed Guide
Once you’ve backed up your data and unlocked your bootloader, the next step is downloading your chosen custom ROM and the appropriate Google Apps (GApps) package, if desired. Always download from reputable sources like the official XDA Developers forum or the ROM developer’s website. Verify checksums to ensure file integrity.
Next, transfer both the ROM and GApps files to your device’s internal storage or SD card. This process varies depending on your device, but typically involves connecting your phone to your computer via USB.
Now, boot your device into recovery mode. This usually involves a combination of button presses while powering on. Common combinations include Power + Volume Down or Power + Volume Up. Consult your device’s specific instructions.
In recovery mode, you’ll navigate using the volume buttons and select options with the power button. It’s crucial to perform a factory reset and wipe the cache partition before flashing a new ROM. This prevents conflicts and ensures a clean installation. Locate the “Wipe” options in your recovery menu.
Finally, locate the “Install” option in your recovery and select the ROM .zip file you transferred earlier. After the ROM installation completes, repeat the process for the GApps package (if applicable). Once finished, reboot your device. The first boot after flashing a new ROM can take longer than usual, so be patient.
Troubleshooting Common Installation Issues
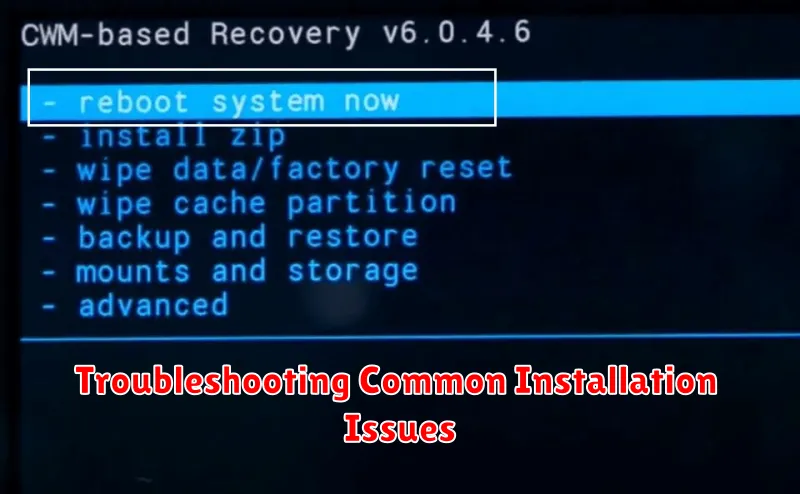
Encountering problems during a custom ROM installation is not uncommon. This section addresses some frequent issues and provides potential solutions.
Bootloop
If your device is stuck in a bootloop (constantly restarting), try rebooting into recovery and wiping the cache and dalvik cache. If the problem persists, reflash the ROM, ensuring you downloaded the correct version for your device.
Status 7 Error
A Status 7 error often indicates an incompatibility between the ROM and your device. Double-check compatibility on the ROM developer’s forum or website. Ensure you’re using the correct recovery for the ROM.
MD5 Mismatch
This error suggests a corrupted download. Re-download the ROM and verify its integrity. Compare the downloaded MD5 checksum with the one provided by the developer.
Storage Issues
Insufficient storage can also hinder installation. Free up space on your device’s internal storage before attempting the installation.
Essential Tips for a Successful ROM Installation
A successful custom ROM installation hinges on careful preparation and attention to detail. Here are some essential tips to ensure a smooth process:
Battery Life: Ensure your device has a full charge or at least 80% battery before starting. A power interruption during installation can severely damage your device.
Backup Your Data: Absolutely crucial is backing up all your important data. Installing a custom ROM usually wipes the device clean. Back up everything—contacts, photos, apps, and other files—to cloud storage or an external device.
Verify Compatibility: Double-check that the chosen ROM is fully compatible with your specific device model. Installing an incompatible ROM can lead to a bootloop or brick your device.
Follow Instructions Carefully: Meticulously follow the ROM installation instructions provided by the developer. Each ROM has its own specific steps. Don’t deviate from the provided guide.
Patience is Key: The installation process may take some time. Be patient and avoid interrupting the process.
Restoring Your Data After ROM Installation
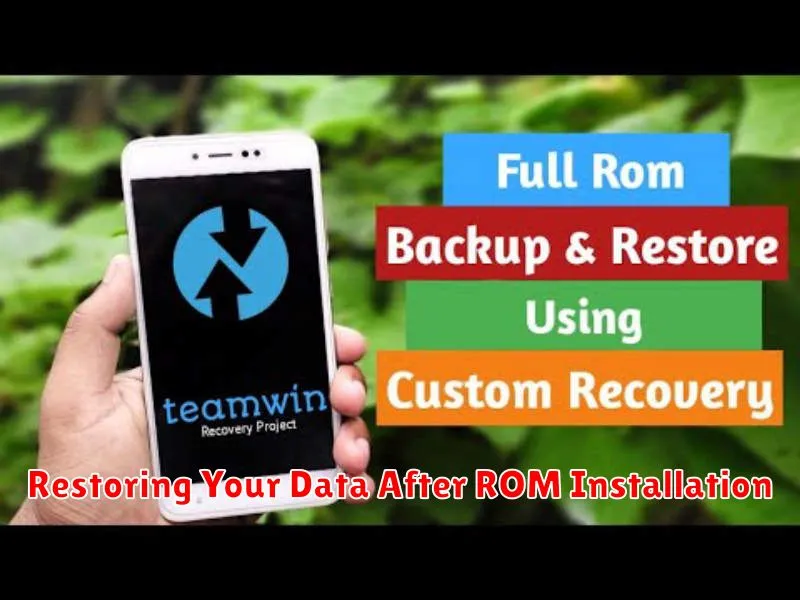
After successfully installing a custom ROM, the next crucial step is restoring your data. A clean install typically wipes your device, so having a backup is essential. The most common methods involve using cloud services or dedicated backup applications.
If you utilized a cloud-based backup, such as Google’s services, restoring is often straightforward. Simply log back into your Google account after the ROM installation completes, and follow the prompts to restore your contacts, calendar events, and other synced data.
For app data, you may need to reinstall individual apps from the Google Play Store. Some apps will automatically restore their data linked to your Google account, while others may require using their individual restore functionalities.
If you used a dedicated backup app like Titanium Backup (which requires root access), you’ll need to reinstall the app and restore from your backup file located on your external SD card or cloud storage.
Important Note: Restoring backups from a previous ROM, especially significantly different versions of Android, can sometimes cause instability. While generally safe, consider if restoring everything is necessary or if starting fresh is a better option for optimal performance.